What are you trying to find???

Thursday, October 27, 2011

Drawers all lined up!

Mama P has been oh-so-busy with more projects for Baby P's room. This one is --GASP!-- a non-sewing project!!! I'll give you a moment to recover while you gaze upon lined drawer furniture loveliness...

But... you know you are craving for the full story on these bad boys, and I am not going to keep you from it. (it's slightly longish and picture heavy, though... so I'ma-make you jump to it... but do it, you know you want to.)

Monday, October 24, 2011

The Black Hole

So I was looking for a really fun lamp for my kiddo's room. I loved this cute little lamp:


but while I adored it, the price tag was too much for me. Sigh.
So I set out to find something just as fun, but maybe a bit cheaper. A few weeks later my friend Amy Lee found and pinned this little lamp she found on pinterest:


Which I loved... until i clicked through to discover the price on that lamp was nearly $400! Holy cow. Not headed in the right direction here with the price tag. But what a bummer, it's a cute lamp.
A few days later I was shopping at HomeGoods (man, I love that store!) and found this...
For a tiny fraction of the price of that super expensive, though quite similar other elephant lamp. SCORE. But here's the problem...
Wah-wah... hey there ugly royal blue gingham lamp shade. You are not really my style. Fear not, I shall change you! Should be easy.
HA.
Plan A: was to cover it with fabric. But I looked and looked for a simple/subtle print to cover the lampshade with, and no luck. I just couldn't find anything I liked. I considered just a solid white shade like the one in the other lamp. But did want to buy one. Soooo...
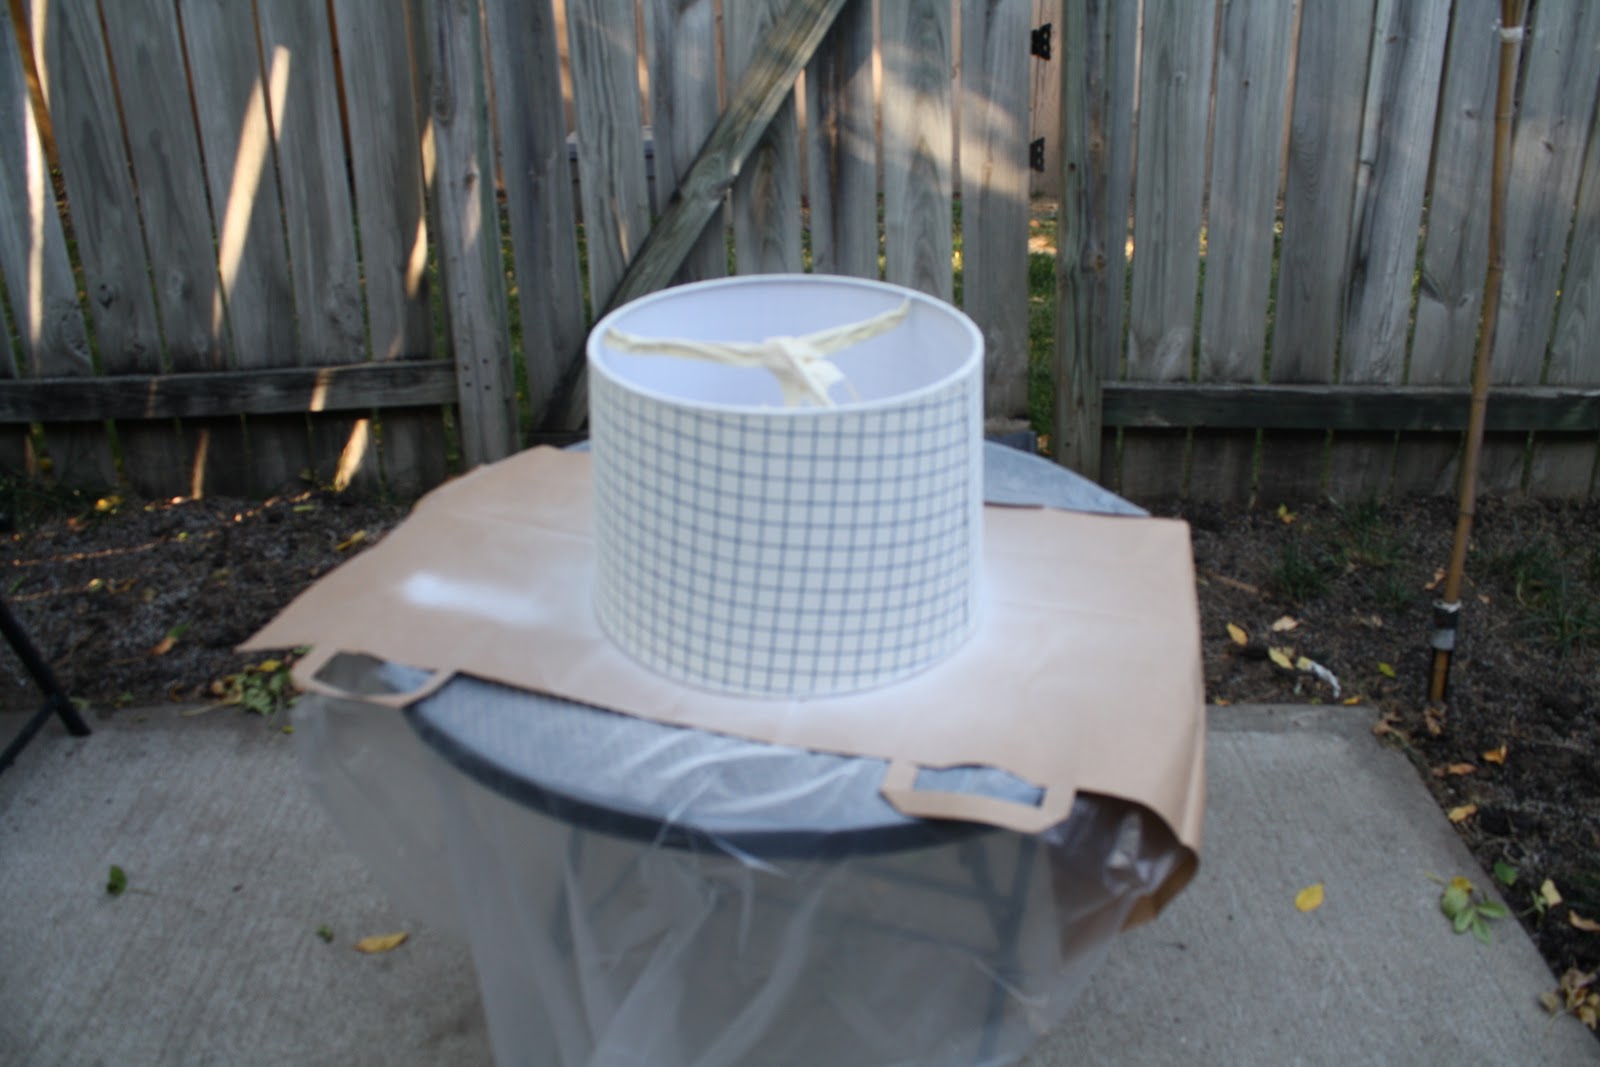
Plan B: I'm going to paint that lamp shade. I got some white spray paint, and some light green that I was going to paint subtle chevrons on the white. It was going to be great. Step one, remove the trim and tape off the hardware:

Next, I decided it couldn't hurt to spray it with some primer I had on hand-- better coverage right? So here is is after 3 coats of spray primer:
Oh.... hey. You can't really tell I painted anything cane you? After using up the rest of my can of primer on this thing, I put down two coats of white spray paint... and it looked about the same. This thing was like trying to paint a black hole. I don't know what happened to it, but any paint sent it's direction was sucked into an abyss never to be seen again. Soooo... plan B.5 I got some white exterior latex paint and brushed it on. nice and thick. once it was dry... still blue gingham. Spray on 3 more coats of white spray paint... still bright blue gingham. 
UUUUUURRRRRRRRRGGGGGGHHHHHHH!
So I gave up on it. Stupid black hole lamp shade. It was feeling rather crusty at this point anyhow, and I was mad. 
Then Amy Lee came over for our crafty night (remember when we made this?) and she convinced me it wasn't hopeless. We sat on the floor draping it with various fabrics and debating cutting the whole thing in pieces. She pulled some leftover quilt fabric out of a bag... and draped it accross the gingham, and we both went... huh.
Because it was white. Just like the original elephant lamp. And we liked it. 
We... didn't take pictures because it was quite late and we were delirious and anxious to get the project done. But... we used a spray adhesive to attach the fabric then trimmed the extra off... (you can google 'covering a lampshade' and get hundreds of results and tutorials if you need more instruction than that... I'll leave that up to you.) Then, to break up the white--just a tiny bit-- we made a bias tape out of the same green fabric I used for the curtains and glued it around the top:
Don't ask me why this is the only picture I took of the entire process. 
Well, actually, that's a lie. I also took this picture:
(Remember how I said it was well after midnight... ??? You knew a whole post about lampshades was going to include at least one reference to a lampshade on someone's head, right?)
Once complete we took it upstairs and installed it on the lamp and...

We love it! I love that it's white... but the white on white pattern is subtle and lovely. Yay yay yay!
Thank you Amy Lee for your help. Baby P's lamp is perfect... and the perfect addition to his room! :)

Saturday, October 22, 2011

Thanks!

Oh, paper crafting.
We have a love/hate relationship. Meaning... I would love to be that kind of crafty... but I really just hate doing it. Scrapbooking? Stamping? Cardmaking? UGH. I am quite poor at all of it, and get little enjoyment. (I DO really enjoy gift wrapping though... does that count as paper crafts?)
But my friends recently threw me a baby shower with all these lovely handmade details, and the whole thing was just perfection-- perfection I knew could not be followed with a store bought thank you. So I sucked it up and got over my 'tude about paper-crafts and set out to make charming thank you notes for my guests.
I saw this idea on the interwebs sometime pre-pinterest... and I cannot tell you where to save my life. Not that it's particularly stunning or difficult or original I just try to credit my inspiration. So If you thought of it first-- let me know. :)
Anyway, I busted out my machine and fabric scraps, as well as some leftover blank cards from wedding stuff. and... made these:
Amy Lee was over and she cut fabric triangles which I free-hand sewed into drapey pennants on thank you notes. Added a little blue thank you stamp... and called it a card. Actually, I'm happy with how it turned out. They are cute, but still quite simple. That's how I like it. Nice is simple.
Now the trick is... writing (and actually sending!!!) thank you notes for all the lovely gifts we received. I have a two week goal on those... I'll let you know how that turns out. ;)

Wednesday, October 12, 2011

The Crib!

The... final piece of furniture was added to Baby P's room a couple weeks ago. I meant to show you then, but was in the middle of the Pinterest Challenge, and in the midst of all that posting it got away from me.
I know to most of you, a crib is a crib, so yay for us we have one. But I am still quite excited about it. Also, it's good just to have another piece of the puzzle in place. It's really starting to feel like we are 'ready' for Baby P. (though ready is in quotes because... can one ever be ready for their first child???)
Anywho before the crib showed up the back wall of Baby P's room was looking a little empty:
But now it looks like this:
Ooh, pretty. (Bonus, you can see Winston ears in the bottom left of this pic... that dog loves this room, and especially that rug. Probably because it is mostly off limits to him.) The crib is lovely and matches the refinished furniture quite well. I am pleased. I like the shape of it, traditional, clean with a little bit of flair... also it's the convertible kind, came with rails to turn into a toddler bed, and eventually full size bed. So we are planning on this being furniture our kiddo can grow with.
We also procured a mattress for our crib (organic cotton fill, because I am getting all crazy like that!) that fits snugly inside... and one evening on a sewing date night with my mama, we used this crib sheet tutorial to make a couple of fitted sheets for the bed.
They were quite easy to whip up in a few minutes and fit the bed perfectly. I love that I could pick my own fabrics in colors and prints that match his room. He has a green polka dot (shown) a blue sprinkle sheet, and a green striped flannel sheet that is so soft and warm. Quite pleased with that simple project.
So there you have it. The last big piece of furniture in Baby P's room. It's starting to really come together now. We are getting excited! Lots more Baby P room projects coming soon, but this week... I am working my fingers off to complete a few baby quilts for the grandmas before a certain Baby P's shower on Sunday. Wish me luck!

Tuesday, October 4, 2011

Covered

LOOK what came in the mail yesterday...
 YES! Diapers! I ordered just two, to see how I liked them, as I haven't been able to find a local store that carries them. It soooo different looking at a picture online and actually holding a product in your hand. And from the cloth diapers I have been able to do 'hold in my hand' style research on... WOW, these things are like the Cadillac of diapers. They are the BumGenius Elemental AIO organic diaper. They are FANCY.
 This inside part is super thick... and oh, my so soft! I just kept squishing it and touching it. I'm not gonna lie, I wouldn't mind underpants made out of that soft stuff... I mean, if something is going to be touching your bum, it might as well feel, good right?
Oh, and here's the best part. Never diapered a child before? The packaging had super helpful instructions:
 Har har. Definitely filing this for future use. My Husband especially was pleased with the detailed instructions.
Anywho... I had to try them out, but have no test child. So Martin (who was our lovely carseat guinea pig/model) volunteered his bum.


 They go on basically just like a disposable would, only you have snaps instead of tape/velcro closures. They come off similarly as well, only coming off you have an extra step... dealing with the poo. We'll get into that issue at a later date, but for today...
 TA-DAH! Doesn't Martin look great in his fancy cloth diaper?
I know that... Martin is only a stuffed bear, but I liked that the diapers fit snugly around even his tiny shape. The leg openings were a bit big, but this well-loved bear's legs are barely holding on by a thread anyhow, so I think it will make a difference when there is an ACTUAL CHILD in them.
Martin also likes that he has color options and an adorably fluffy bum. (He's a vain bear)
Okay, enough with the bear, I know I'm a dork. And WAY more excited than I should be about diapers. But I have high hopes and good expectations for our cloth diapering experience. I've got the husband on board now, and he seemed impressed with the diapers when he checked things out last night. The worst thing about these specific diapers is the price tag... which is why I really wanted to see them before investing in a full set. But I am impressed with the quality (and softness!), and I feel confident about the decision to go this route.
We put all our cloth diapering needs on our Amazon.com Baby Registry and we are crossing our fingers and toes that our friends and family see that on there and might help us put a dent in that necessary expense (even thought diapers seem like a less 'fun' gift to give someone.)
Just a few more months and we will give these things a spin for real... Woo-hoo!

Saturday, October 1, 2011

Pinterest Challenge: Project #4 And Wrap-up!

This post should probably be sub-titled: We hot glued EVERYTHING to this wreath.

SO! Are you getting tired of baby projects yet? If you aren't, you are in luck, becuase I have a ton more coming. If you are, you are in luck... because this one is in no way baby related! YAY.
This project has been over a year in the making. No joke. It's part of the Pinterest Challenge, but it's from back in the day when my personal pinterest use was more like a word document where I posted links to things I wanted to remember... (long before I knew of the wonders and ease of pinterest!)  
(Okay side note again about what was it even LIKE to be crafty before people had the internet-- yes, I know I am showing my age here, but I have pretty much had access to computers as long as I can remember, and access to internet since middle school-- but seriously, old school crafty people are hard core because they either had to be original or go to a lot more trouble to find and steal other people's ideas. I mean, right now... If I wanted to silver leaf a side table, all I would have to do is type it into google, and about 50 images and tutorials would pop up.  Easy as apple pie... which oh man sounds really good. I was thinking about making one this weekend, I think thats going to have to happen. I love fall. Wait... what was I talking about? Crap, I think I just tangent-ed my tangent. Awesome.)
Anywho... well over a year ago I found this lovely wreath. I liked it because it was simple, unique, and mostly because it was square. And I wanted one. Bad enough that I bought the supplies to make it. And... then I didn't. And fall came and went, as did Christmas, and I packed up my fall decor when Christmas went up and forgot about it, until a couple weeks ago I found the same image on pinterest again and though... YES! It's going to happen this year!
So last night Amy Lee came over and we crafted late into the night. But I knew I wanted to get this done for my final pinterest challenge. So let me assure you that this project was, in fact, completed (not much) before midnight on the 30th of Sept... qualifying it for the challenge, by decree of those strict strict rules.
The original inspiration included a tutorial, so check her's out if you want a how to. But it's mostly something like this: Cut a square out of foam board, glue leaves to it, done!
We got fancy and added sparkly berries. And I didn't have a nifty wreath hanger, so we improvised with some gold ribbon. But then I was all, wait, what do I tie the ribbon to? And Amy asked if I had any 3M hooks or tape. Um... no? But I did have a glue gun all hot and bubbling... So uh... you can see where this is going. We hot glued the ribbons to the top of the door, and crisis averted. Because it's so light, it holds easily to the door, but the hot glue peels off with minimal damage (just in case you were wondering.) Win.
 Glued to my door. I love it. It was late and dark out, but I wanted a picture of it from the outside too. Becuase it is made of foamboard and paper leaves it is nice and lightweight and THIN, meaning it fits nicely between our storm door and front door. But it did flop around when you opened the door... nothing a little dollup of hot glue couldn't fix. Yup we glued it to the door. Again.
 I told you we hot glued EVERYTHING to this wreath. Or this wreath to everything. Or something.
Here's a close up, I know it's a little busy, but I kinda like it, and I like how colorful it is. And I am proud that I actually finished it this year. Yay. And thank you Amy Lee for your wreath gluing help. :)
Happy Fall!

...........................................................................

And... That, my friends, wraps up the Pinterest Challenge. I am glad you followed along, and I love those of you who participated! It's my hope that we all learned something from this, becuase here's what I learned: Pinterest (or the internet, or creative blogs...) can be a great resource for inspiration, but they can also be a worthless time-suck if you never stop clicking and start doing. So my personal challenge is keep it up. To continue to let the inspiration be just that-- inspiring me to create and be wonderful things-- and not just stop with a computer click. Amen.